
It is Week 2 and I’m following along from home with the projects going on at the fabulous Calling It Home. Linda hosts a bi-annual challenge called the One Room Challenge. In six weeks, I’m revamping my outdated, oversized hallway area into a homework area for my three kiddos. I know if I had an unlimited budget, I could blow it out of the waters with high end furniture and killer light fixtures. But, like many of us, I’m on a budget here. Everything has to be budget friendly AND kid friendly. But I’m a huge believer that good design can be accomplished for any budget, so I’m going to put that to the test for this room. I’ve set out to create a triple homework area with some neutral, industrial inspired touches. If you missed last week (BELIEVE me, the ugly “befores” are worth taking a peek), check it out HERE!
Whenever I tackle a new space, I can get super overwhelmed! There are so many fantastic ideas out there, so how do I sift through them all and make them my own? I always start off on Pinterest, and created a new board. You can follow my Kid’s Hang Out Area Board to see some amazing homework centers and playrooms if you need some inspiration! But then, like I do for all of my clients, I create a Mood Board. This helps narrow down all of the ideas and see what the look like all pulled together. I have to tell you, this is narrowed down from dozens of choices I intitally selected. Some of these are actual items I am purchasing, and some are just inspiration.

I started off with this off-the-top beautiful industrial inspired playroom from Restoration Hardware Baby and Child. They have some gorgeous children’s furniture that blows my mind. However, it is way out of the budget that I have set for this room. So I started it off as my inspiration, and I’m picking out the elements I love from it. I wanted a mix of farmhouse and industrial, and a super neutral space.
I decided that I wanted a completely open desk (no built-in cabinets) for a couple of reasons. One, it will be the least expensive way to create a desk. But also, I wanted to keep the use of this area flexible. Someday, we may want to use this desk for another purpose, and sometimes built-ins can leave you stuck with one purpose.
Which means this week it is all about the SHOPPING! Don’t you love seeing those Target boxes just piling up on your front step too?
(simply click on the name of each object to take you right to the source if you love it, want it, need it too):
Wire Baskets: So instead of built-in stoarge, I am going to use a few industrial looking baskets on top of the desk for supplies. (Our kiddos keep their backpacks and homework in their mudroom lockers anyways, so I don’t need tons of storage). And when you are on a budget, what store should you always start with? That’s right, Target baby! (You can say it with the optional French accent). It’s hand-downs the best place for gorgeous items at a steal. I actually found a larger size than this one, big enough to hold papers.

Farmhouse Table: I’m thinking maybe a wood top with some painted turned legs would work for the desk. You can buy these individual legs at places like Lowes and Home Depot for a great price. I need the desk to be long enough to accomodate three kiddos, so I’m thinking about 8′ long. I have some different ideas for the best economical way to create the wood top. Stay tuned. I love how this one is for three kids, just like our home.

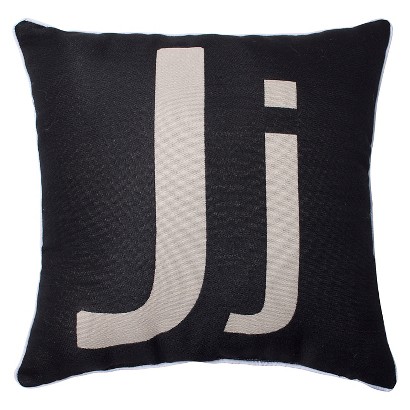
Monogrammed Pillows: Another Target find, as soon as I found these I knew I had to have them! I love the simple, industrial vibe they give off. But I was also a Biochemistry major in college (I know, right? And now I’m an interior designer? I’ll tell you that story someday.). So I fell for these pillows with their riff on the Periodic Table of Elements. I grabbed one up for each child’s monogram.
Vintage Inspired Flashcards These are straight from the Inspirational photo from Restoration Hardware. Since I’m doing a homework desk, I love the nod to the schoolhouse. However, at $24/ea, I’m thinking I can use Photoshop and create a similar look for free. And maybe choose my own words…

Black Sconces If you remember from last week’s post, I fell for some black industrial looking sconces. Lighting is a place where you have to be uber careful about the budget, you can spend thousands of dollars on beautiful light fixtures. But I found these barn light inspired sconces for less than $69 each (half off from the original price over on Amazon). I’m thinking with a little bit of paint, these could work…

Here’s my inspiration from this goregous BHG photo! I’m going to put three sconces up, one for each child.

Seersucker Curtains I love this seersucker pattern as the fabric for my curtains. There is a reason it is a southern classic. Instead of creating custom, I found these beautiful seersucker DUVETS from Target that I’m going to transform into curtains. As I tried to explain to my daughter when she wanted me to sew her a custom dress, my sewing skills are sadly truly basic. So I’m loving this no-sew option!

Swiss Cross Rug I’ve had a thing for the Swiss Cross pattern since using it in a client’s dining room. Here’s an adorable playroom featuring the pattern. I love the pattern on the one I found from Land of Nod, but it only comes in bright colors. I’m thinking I may have to do some DIY magic here.

Industrial Ceiling Light The track lights must go! I used this ceiling light for a Laundry Room Mini Makeover I did, and knew I would use it someday. And it only clocks in at $79! A no-brainer.
Industrial Desk Chair This one is called the “Franklin” and I found this vintage schoolhouse inspired chair for $75 over at Target! I’m buying three of them, one of each kiddo. And I’m seriously loving the price.

Since I have my fixtures, I have to figure out my final layout. I’m going to do about an 8′ long desk since that is a standard length for lumber for our desk top. Some new light fixtures, a DIY shiplap wall, and hardwood floors will round out the room:

Okay, so when you combine the Floor Plan with the Mood Board, here is something similar to what I’m hoping the room will look like! We’re going to do a shiplap wall painted in white, a rustic DIY desk, some wideplank hickory hardwood floors (to match the rest of the house), and some black light fixtures. The floors have already been installed (see next week for the photos on that!) Throw in a graphic rug and new curtains, and we have ourselves a homework area for three kids:

So for Week 3: It’s construction time! Everything has been planned out and purchased, and I have some DIY ideas we need to implement….check into the progress everyone is making over at: One Room Challenge with Calling It Home! The big project will be installing and painting our ship lap wall. There are so many different ways to create one…
In the meantime, feel free to look around my blog, follow me on Facebook or Pinterest, and join in on the fun-I’ll be sharing behind the scences photos on both Facebook AND Instagram!
Love,


Oooh, I love where this is headed! One light per kid is perfect and you know I do love that shiplap! 🙂
I think I would shiplap every room in my house now if the hubby would let me 🙂
Oh my gosh…yesssss! I pinned those same vocabulary word prints a while back and was planning on creating a version of my own too for a boy nursery! (And then we had our girl! ;)) Great minds…
LOVE the triple desk!!! This is a great project! xx
They were the easiest things to recreate-I didn’t even need my Photoshop, I made them on Publisher of all things for FREE! 🙂 Maybe you’ll get a chance to do a boy nursery too!
Love the wall art! I agree, it’s definitely something you could recreate. And those chairs! OMG great find!!
Oh My!!! This space is going to be amazing! I would totally love a space like this for my kiddos!
Love this room! You are doing what I’ve needed to do for about three years now and just haven’t found inspiration for! I too have three kids and was a pharmacologist turned interior designer :). I think there is something about a scientific brain that translates well into interior design. Can’t wait to see this all come together and then I’ll steal a bunch of your ideas for a homework room in my house 🙂 !
Erin-that is too funny! I know people are always shocked to hear my college major-but you might be right, and we have the best job ever! I’ll have to check out your stuff…and yes, come back in a few weeks and steal away!
I love how you are stretching your budget seersucker duvet into drapes, awesome! Can’t wait to see more!
Every detail of this room is designed so professionally! You have done an amazing job! You are right up there with the featured designers.
Maria
Thanks so much for the kind words Maria! This is my first ORC so I’m having a lot of fun following all of these amazing creative people!
This is going to be great! Love how there is individual space for 3! Also, love your website and your e-design services presentation is really nice!
Thanks so much Rosanna, it is all pretty new-so I’m so glad you like it! 🙂
Kristin I adore the direction that your room is headed towards! You did SO much better than I did in my room this week.
I would love for you to share this post at Thoughts of Home on Thursday. I think our readers would really enjoy it!
Good luck in the upcoming week!
Thanks so much Kim! I’ll be sure to share it on Thursday! Good luck to you too, I’m going on vacation this week so trying to get a lot done BEFORE leaving!
Oh my gosh! I love everything! I mean, everything! I want to come and do homework at your house! My favorite elements – I love the desk idea with the turned legs, those chairs – perfect – and your great find on lighting! I can’t wait for next week! PS. – what do you use to create the perspective?
Hi Kim-thanks so much 🙂 Let’s hope the kiddos will actually do homework here once it is done! 🙂 I used Chief Architect to build the background and then I used Photoshop to put in the actual fixtures. That’s the combo I’ve been using with my clients and it seems to work pretty well!
I can’t wait to see this all come together – I love your design!
I LOVE your plan! Those flash cards are so cute and I think it’s even better to make your own with words that are special to you all. Can’t wait to see it all unfold.
Thank-you so much! I just finished making them…easier than I thought! Can’t wait to see everyone’s projects this weeek 🙂
Oh my goodness!!! I love your ideas for the space! Everything works beautifully together. I absolutely am pinning your mood board, as I pretty much need (want) everything you’ve found!
I’ve been searching for a long table like this for sunroom for work/crafting! Where did you end up finding yours? I couldn’t find the info on your site! THX!
Hi Kristy! I ended up getting it from Ikea! It is called the “Karlby” desktop, it comes in two sizes (this was the largest) and I got mine in the “walnut” color. I have loved it so far, and it was much less work than trying to cut and stain it myself 🙂 Good luck!
That is so smart to use a countertop! I just looked at the, it’s perfect. Did you secure your trestle legs to the top or did you just use the rubber bumpers and set it on top?
Kristy, You actually don’t secure the legs to the countertop…I was a little wary of it at first but it hasn’t been a problem at all-it hasn’t shifted one bit. Thanks so much! 🙂
Lovely. Regarding the IKEA kids work area (mahogany top and industrial legs) I went to the IKEA site but cannot find that model. Can you help?
Sure thing! The countertop is called the Karlby (I used the longest length and in the “walnut finish”) here is the link: http://www.ikea.com/us/en/catalog/products/20275140/ And the legs are an equally great deal…they come in a set of two and are called “Lerberg”, here is the link to that! http://www.ikea.com/us/en/catalog/products/80130776/ I love, love, love it…I hope you do too! 🙂 Cheers! Kristin
Oh goodness! Came across your blog while searching farmhouse homework table solutions for my 3 boys! Love how yours turned out and glad I found your blog.. I am turning an old tile top table with fabulous turned legs into my boys homework table. What depth did you use on yours and are you happy with it? Currently the table is a normal width table but I was thinking about making it more narrow with the new top. Thoughts?!
Hi Sara! Sorry for the late reply-we’re on Spring Break and I’m just now checking back to the real world 🙂 I’m so glad you found me! I bet your boys LOVE having a homework desk…mine is a top from Ikea and I THINK it is about 30″ which is perfect…for homework and that’s where I also fold laundry from time to time 🙂 I would love to see your desk when it’s all done!
What software do you use to make your “Perspective” view? BTW this is an awesome room!
Missy, Thanks so much! I use a combo of two things-I create the room “perspective” in Chief Architect, then I add in items with Photoshop 🙂