
Wow! I can’t believe it is already Week #5 of the One Room Challenge, a bi-annual event where the blog Calling It Home sponsors and invites 20 designers to complete a total room design in just six weeks. I am following along with them from home, and keeping the same timeline to transform our boring white hallway into a customized homework area for our three kiddos. The big emphasis on this project is doing something that is BUDGET FRIENDLY. If you look back to Week #1, I shared so many gorgeous inspirational photos, and while I would love to have any of those rooms in my house, I know they cost thousands and thousands of dollars. So my goal is to replicate a similar farmhouse meets industrial vibe, but do it all on a budget. Week #2 was all about coming up with a plan, check out my Mood Board and custom renderings to see the vision for the space!
Over the last few weeks, I showed you our budget-friendly ship lap wall made of MDF (big cost savings!), and in Week #4 a $20 DIY Swiss Cross Rug I painted. I also shared my tip for inexpensive “One Minute Curtains” that I’m lovin’. But this week it is Desk Time! I knew I wanted some sort of triple seater for the desk area, something similar to this shared desk:

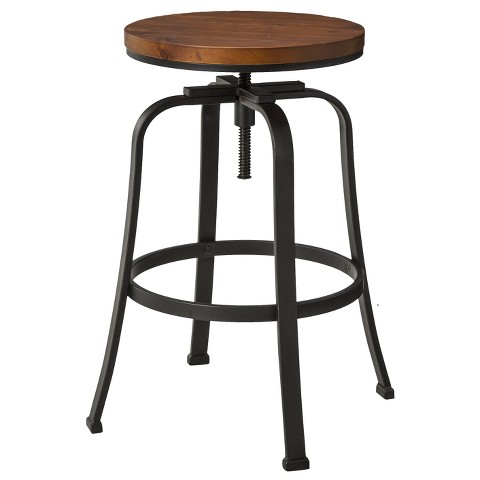
So my first hunt was for the chairs, here are some of my final choices I narrowed it down to. I wanted something industrial AND affordable. I loved this one, it is (of course) from Target, and only $89.99, but then I thought I would rather have actual chairs than stools for the kids to sit on.
We have been seeing this style of chair everywhere, it is industrial, it is pretty, and it is super affordable ($99 for two!). But maybe I have seen it a little TOO much:

So after having waaaaay too much fun looking through all of these beauties, I found this one. It is also from Target, and it is part of their Industrial Shop line. I snagged them on sale for only $75 each (normally still a great price at $99. P.S. They also have coordinating dining room chairs!). So I bought three of them:

Now time for the desk! I have dreamed since the beginning of doing a triple homework desk so each of my three kids could have their own assigned spot (no fighting). I figured I would have to create one of my own. As you can see from my Mood Board, I had originally planned on creating a custom desk, painting the legs, and staining a top. I figured I could create one for a couple hundred dollars and a dozen hours or so.
 But then I was trolling online and started searching Ikea’s site late one night a couple of weeks ago (why would I do this right before bed?! I stayed up way too late getting lost in Ikea land). And since I was getting over the flu (ugg) and WAY behind with life right now, I’m stoked about the idea of getting something I love that doesn’t need to be built from scratch.
So we took a very last minute trip to Ikea! Have you even taken three kids to Ikea on a Saturday? Total rookie move, I know, but this was the only free day to drive the two hours one way to get to our closest Ikea. Our first time taking our kids a couple of years back, we ended up with two in tears, one bleeding from the head, and a very frazzled Mom and Dad. As we frantically tried to find our way out of the maze of Ikea floors, praying for a secret way out, our kid’s crying got louder, and I started sweating harder. Oh but this time we had a plan. I found the table legs and top online, and went straight to the basement level, bypassing all of the crazy above, and it was a pretty simple search and find process. In and out in less than an hour! Our little dude found the best seat in the joint as he was pushed around like a little prince. I’m pretty sure this was NOT the intended use for this cart:

As always, it blows my mind at the prices Ikea has. I settled on a sturdy metal leg called the LERBERG at only $15 each! These don’t have a cheap look to them in real life, they are SOLID. They are metal with a matte finish to them.

But the thing that really sold me was finding this goregous wood top. Ikea offers several different finishes and sizes of their Karlby Countertop, and I chose this deep rich walnut finish. And this 8′ top was only $189. Totally done and finished, which means no sanding and staining for moi! Best part is, it can totally be refinished. As a note to the purists, it does have a particle board core and then has the wood veneer over it. I’m telling you in real life it is really beautiful, it doesn’t look cheap at all. It looks amazing in fact.

The Ikea legs were pretty easy to put together, and the wood top was packaged really well so it was in perfect condition when we opened it up. I really like how it works with my Franklin desk chairs. The wood on the chairs in much lighter so it’s a nice mix of finishes. Interesting note: the legs don’t actually attach to the top. You simply rest the countertop on top of the legs. I was a little worried about this at first, but it actually seems to work out quite well!

I’ll be honest, those Target chairs were a PAIN to put together. My wonderful hubby was kind enough to do it for me, and it took him over a hour to put these together (and he’s a licensed builder!). That’s true love to me. Better than flowers. I love how they turned out….the kids already claimed their own chair. Of course.

One other DIY project I created were vintage inspired flashcards. If you go back to Week 1, I had these gorgeous cards from Restoration Hardware as part of my Mood Board. I love the idea of putting some schoolhouse charm into my kid’s desk area, but at $24/ea (on sale no less), I didn’t want to spend that much on a piece of paper.

Since I have three work spaces on the desk, I wanted to create three flashcards, about 8 1/2″ x 11″ each. I figured I could re-create it using Photoshop. But when I started really thinking about it, I could use a simple PowerPoint document to re-create this! So this is how I created it:
Open up a new, blank PowerPoint document, formatted for a letter size.
I chose the “Century Gothic” font in bold. I typed the large words in 120 font and the smaller in 25 font.
Highlight the key words in red.
Then using the rectangle tool, I drew a line to go across the page, adjusting the size, and changing the color to black.
Then I printed it off onto white cardstock.
Then my mom brain really started thinking: “Okay, what if I could turn this into a life lesson? (I know, that is such a Mom thing to do)
“What three words would I want to instill into my children’s character?”
So these are the three word combinations I chose, even sneaking a Proverbs Bible verse.

I already owned three frames that I bought on clearance years ago, that I was planning on re-using. So excited with how they turned out…and FREE is always better than spending almost $75 at Restoration Hardware.

So dum, dum, dum….come back next week for the FINAL REVEAL of my kid’s homework station! You will see the culmination of all of these little DIY projects into a kid-friendly space. I cannot even believe it is almost done! Wow, these last five weeks flew by! Stay in touch on Facebook and Instagram to see behind-the-scences photos and more!
Have questions about this project (or just design questions in general!), email me and we can chat: kristin@postboxdesigns.com!
I’ll catch you in one week for the big reveal…


Amazing! In some ways I’m so happy Ikea is 3 hours away for me because I would get lost in Ikea land way to much. The chairs and counter top are amazing. I’m so inspired by this room makeover. I’m seriously going to nix my dining room table this summer and create something like what you are doing. Awesome! I can’t wait for the reveal.
Thanks so much Nancy! I am way behind and still need to check out more of the ORCs from last week! My husband already used the desk last night…so we are putting it to work! 🙂
Kristin I adore the sneak peeks and I can’t wait for the reveal! I love the direction the space is going in. As a fellow ORC participant it’s been wonderful to gather some fantastic inspiration. I’d love for you to share your progress at Thoughts of Home on Thursday. Our readers would love to see it. The gathering is at http://www.decortoadore.net
It’s looking so good! We had those same trestles for our dining table for a couple of years. They held up great and the not-being-attached thing didn’t cause any major issues (it was mildly annoying but no biggie).
THanks Lizzie! I’m glad to hear that…I was a bit worried at first but it does seem really steady…as long as the kids don’t dance on the tabletop I think we will be okay…although I wouldn’t put it past my bunch… 🙂